You’ve watched the tutorials. Somewhere between the contour sticks, the three types of primer and the brush you’ve never heard of, you started to feel like makeup was a part-time job. So you gave up, or you stuck with one half-finished look you wear on repeat.
Here’s the good news. A simple everyday makeup routine needs far fewer products than the internet suggests. A handful of well-chosen basics, applied in the right order, can make you look rested, even-toned and put together in about five minutes.
This guide walks through exactly that. You’ll learn what to buy, what to skip, how to apply each step, and which common mistakes make makeup look heavier than it should.
What a Simple Everyday Makeup Routine Really Means
A daily makeup routine isn’t about covering your face. It’s about evening out what bothers you and adding a little life where the light doesn’t reach.
Think of it as editing, not repainting. You keep your skin looking like skin, and you boost your best features with a few small touches.
Most minimal makeup routines share the same core idea: fewer steps, better placement. A tiny bit of colour in the right spot does more than a full face of product applied without a plan.
The Five Products That Cover Almost Everything
If you’re starting from scratch, this is the shortlist:
- Skin tint, light foundation or tinted moisturiser for an even base
- Concealer for dark circles and spots
- Cream or liquid blush for colour that looks like it belongs on your face
- Mascara to open up your eyes
- Tinted lip balm or a soft lipstick to finish
Everything else, such as highlighter, bronzer, eyeshadow and liner, is optional. Add them later if you enjoy them, but you don’t need them to look polished.
Start With the Skin, Not the Makeup
Makeup sits on top of your skin, so the skin decides how it looks. Dry, flaky patches grab foundation. Oily areas let it slide. A five-minute prep routine solves most of that.
Cleanse your face, then apply a moisturiser suited to your skin type. If you’re unsure what that means for you, our guide to choosing the right moisturizer for your skin type breaks it down simply. Oily skin usually prefers lightweight gel formulas, while dry skin does better with richer creams.
Then comes sunscreen, which is the one step worth never skipping. Dermatologists consistently recommend daily SPF, and it works well as the final skincare step before makeup. Give it a minute or two to settle before moving on.
If your skincare feels like a puzzle, it might help to see how popular budget-friendly brands stack up. Our comparison of how CeraVe and The Ordinary compare is a useful starting point.
Do You Need a Primer?
Not at first. A primer smooths the surface and can help makeup last longer, which is useful on oily skin or in hot weather. But if your moisturiser and SPF are doing their jobs, you can leave it out and lose nothing.
The Right Order: Makeup Order of Application, Step by Step
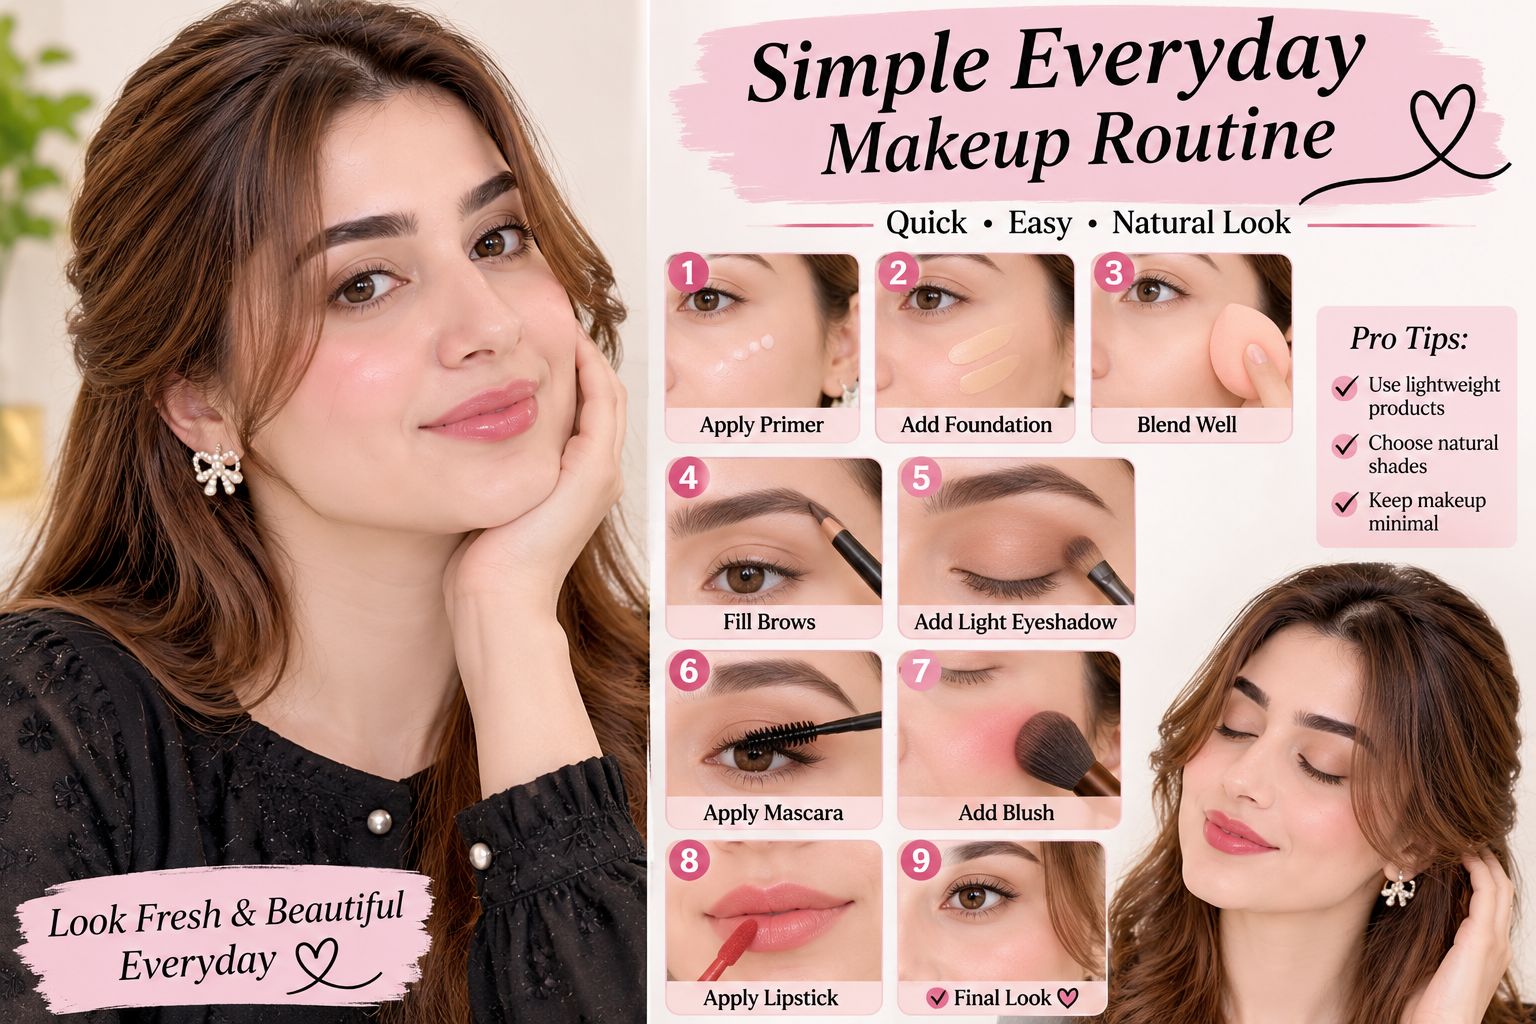
Order matters more than most beginners realise. Put products on in the wrong sequence and they pull, streak or wipe each other away. This is the order that works for most people.
Step 1: Base (Skin Tint or Foundation)
Use a small amount. Dot it on the centre of your face, such as the cheeks, forehead and chin, then blend outward with clean fingers, a damp sponge or a foundation brush.
The common mistake is applying it all over to the hairline and neck in a thick layer. Focus on the middle of the face, where colour tends to be uneven, and let the edges stay natural.
Sheer coverage is your friend here. You can always add a second thin layer to areas that need it.
Step 2: Concealer, Only Where You Need It
Dab concealer under the eyes in a small triangle shape, on any spots, and around the sides of the nose if there’s redness. Tap it in with your ring finger or a small sponge rather than rubbing.
Pick a shade that matches your skin or sits just a touch lighter. Going far lighter creates a grey, mask-like effect that’s hard to hide.
Step 3: Blush for a Fresh Look
Blush is the quickest way to look awake. Smile, then place the colour on the round part of your cheeks and blend it up towards your temples.
Cream blush blends easily into a skin tint and gives a natural finish, and a small amount goes a long way. Powder blush works well over powder or on oilier skin.
Not sure which shade? Soft peach and warm pink suit many skin tones. Deeper skin often looks beautiful in rich berry, warm terracotta or deep rose.
Step 4: Brows and Mascara
Brush your brows upward and set them with a clear or tinted gel. If they’re sparse, fill in gaps with light, hair-like strokes.
For mascara, wiggle the wand at the base of the lashes and pull it through to the tips. One coat looks natural, and two looks more defined. Curling your lashes first adds lift with almost no effort.
Step 5: Lips
A tinted balm gives soft colour and keeps lips comfortable. If you prefer more definition, press a lipstick on with your finger and blot it. This gives a stained, soft-focus finish that wears off evenly.
Optional Final Touch: A Little Powder
If you tend to get shiny, lightly dust powder on your forehead, nose and chin only. Leave your cheeks alone so your skin keeps its glow.
How to Choose the Right Shade (Without Guessing)
Shade matching is where many people lose confidence. A little knowledge helps.
Skin has two things to consider: depth (how light or deep it is) and undertone (the subtle warm, cool or neutral tint beneath the surface). Warm undertones lean golden or peachy, cool undertones lean pink or bluish, and neutral sits in between.
A quick, practical way to test is to swipe a few shades along your jawline in natural daylight. The one that disappears into your skin is the match. Don’t judge the colour under shop lighting, which can be misleading.
If you can, test the product for a few hours before buying, since some formulas change colour as they settle on your skin.
A Realistic Five-Minute Routine for Busy Mornings
Imagine it’s 7:40 a.m. and you’re due out at eight. Here’s how the routine looks when you’re short on time:
- Apply moisturiser and SPF while you’re doing something else, like waiting for the kettle.
- Dab skin tint on your cheeks, nose and forehead and blend it quickly.
- Tap concealer under your eyes.
- Add cream blush to your cheeks and smile.
- Brush your brows, apply one coat of mascara, and swipe on a tinted balm.
Done. That’s a complete 5-minute makeup look, and nobody would call it heavy.
Two Variations for Different Days
The no-base day: Skip foundation entirely. Use concealer only where needed, then blush, mascara and balm. It’s perfect for weekends or when your skin is behaving.
The slightly dressed-up day: Follow the five-minute routine, then add a soft brown eyeshadow across the lid and a little highlighter on the tops of your cheekbones. It takes two extra minutes and looks more evening-ready.
Makeup for Beginners: The Mistakes That Cause the Most Trouble
Most problems come from a few repeating habits. Fix these and your makeup improves immediately.
- Using too much product at once. Start small. It’s far easier to add than to remove.
- Skipping blending. Harsh edges around blush, concealer or foundation are what make makeup look obvious.
- Matching foundation to your face in the wrong light. Check your shade near a window.
- Applying powder everywhere. Too much can make skin look flat and emphasise dry patches.
- Forgetting the neck and jawline. If your base is a very different colour from your neck, blend downward a little.
- Never cleaning your tools. Brushes and sponges collect oil and product, which can irritate skin and cause uneven application. Wash brushes regularly and clean sponges often.
Tools That Make Life Easier (And the Ones You Can Skip)
You don’t need a full brush set. Three tools handle nearly everything:
- A damp makeup sponge for blending base and concealer
- A fluffy blush brush for soft, diffused colour
- An eyelash curler because it’s cheap and makes a big difference
Your fingers are also a perfectly good tool. Warmth from your skin helps cream products melt in, which is why many beginners find fingers the easiest way to start.
Looking After Your Skin and Your Products
A routine only works if your skin stays happy, so a few habits are worth building in.
Remove your makeup before bed. Sleeping in makeup can leave your skin feeling clogged and tired, and it’s an easy habit to fix. A gentle cleanser or cleansing balm followed by a rinse does the job.
Check expiry dates, too. As a widely followed guideline, mascara is best replaced around every three months, since bacteria can build up once the tube is opened. Most products also carry a small symbol showing how many months they’re good for after opening.
And if you notice persistent irritation, redness or breakouts after introducing a new product, stop using it. Your skin is a better judge than any trend.
How to Build on This Routine Over Time
Once the basics feel natural, you can grow your routine at your own pace.
If you’re a beginner: Stick to the five core products and practise placement. Spend a week just focusing on blending.
If you’re comfortable with the basics: Try adding a soft bronzer for warmth, a subtle highlighter on the high points of your face, or a neutral eyeshadow shade you can wear every day.
If you want a more polished finish: Experiment with setting spray, a lip liner for longer-lasting colour, or a thin line of eyeliner close to the lashes. Each one adds something, but none is required.
The aim isn’t to collect products. It’s to know which two or three make the biggest difference on your face.
Frequently Asked Questions
What is the simplest makeup routine for beginners?
The simplest routine is moisturiser, SPF, a light skin tint, concealer where needed, cream blush, mascara and a tinted lip balm. It takes about five minutes and covers most of what people want from everyday makeup.
In what order should I apply makeup?
Apply skincare first (moisturiser, then SPF), followed by foundation or skin tint, concealer, cream products like blush, then powder products. Finish with brows, mascara and lip colour. Cream goes before powder because powder can stop cream products from blending.
How can I look natural with makeup on?
Use less product than you think you need, blend thoroughly, and choose shades close to your skin tone. Sheer or buildable formulas help, and applying base only where you need it keeps your skin looking like skin.
Do I need foundation for a natural makeup look?
No. Many people prefer a skin tint, tinted moisturiser or just concealer. If your skin tone is fairly even, you can skip a base altogether and focus on blush, mascara and lips.
How often should I clean my makeup brushes and sponges?
Wash brushes regularly, and clean sponges more often, since they touch your skin and hold moisture. Dirty tools can irritate skin and make makeup look patchy.
Final Thoughts: Make It Yours
A good everyday routine isn’t the one with the most steps. It’s the one you’ll actually do on a Tuesday morning when you’re running late.
Start with the five basics, learn where each one belongs, and let the rest come with practice. Your first few tries might look a bit off, and that’s completely normal. By the end of the week, your hands will know the routine without you thinking about it.